This is a little bit different than most of our posts and a continuation of our Saving money on Gardening article from earlier this year. Part of this also is inspired by one of my favorite rides at Epcot, Living With The Lands. Gardening can be a relaxing hobby but can be stressful during the summer when water is a little more scarce. I learned about a wicking tub model last year and tested it before putting it out there. It is efficient for maintaining water levels for the plants without requiring daily watering. I will layout the way that I made a wicking tub and provide other options if certain things are not available. Let’s jump into building a wicking tub DIY!
What is needed?
- Food grade 55 gal barrel
- 1” PVC pipe
- Garden cloth
- Plastic Coffee containers or 6″ Culvert Corrugated drainage pipe at
- Potting soil
- Nutrients/fertilizer
How it works
When it is completed, this will provide a water reservoir underneath the grow medium that will slowly wick up over time as the soil starts to dry out. There will be a drainage hole partway up to prevent overfilling and decrease the risk of root rot. The best part is that it can be used repeatedly each year.
Let’s get started
Barrel prep
The barrels are the most important part of the Wicking tub DIY but can be tricky to find. You can pick them up at stores new or can buy them used at various locations such as craigslist or Facebook marketplace (just make sure they are reliable). I have found them for around $20 per barrel which isn’t too bad as this will last several years.
First, you will need to cut the barrel in half, which can be done with Sawzall or a hand saw. It doesn’t need to be exact but the closer the better. Should be roughly 36inches. And make sure to clean the inside of the barrel, especially if used.

After you have cut the barrel in half, then drill a single hole through the side of the barrel about 4 inches from the ground which will be the top of the water reservoir and will work as the gauge for the water. For this, you will want to use a 3/4 inch drill bit.
Next, you will need to cut the drainage pipe if you have purchased this or drill holes in the coffee containers. By drilling holes, it will prevent extra air pockets that could lead to the risk of mold.
Note that it will require 5-7 large coffee containers to fill a majority of the bottom. You could also use soda bottles but will need several of them as well.

Now cut the garden cloth or fabric around twice the diameter of the container, this will provide extra wiggle room if needed. It is recommended to use PVC- based garden cloth as this will be less likely to break down over time.
Putting the pieces together
Place the containers in the bottom of the two barrel halves. Can put them in any patter that you would like, as long as it covers a majority of the base.
Drape the garden fabric over the containers/drainage pipe and tuck it in slightly. It should not touch the bottom but be below the top of the containers at several points. It should basically look like you are forming the fabric to the barrel.

Next, you will add in potting soil. This will take quite a bit of soil to fill the barrel up. Usually around 40-55 qts of potting soil. It shouldn’t be to the top of the barrel but within a few inches of the top or the very least of 6-8 inches of soil base. Cut the 1” PVC to about 2 ½ feet or about 1 inch above the top of the barrel.

Slide the pipe between the fabric and the barrel, this will be used to fill up the barrel with water. I recommend filling the barrel once to the point where water drains out of the hole on the side. Give it a few minutes to an hour, then add more water because it will slowly flow into the air pockets of the containers. This year, I’m trying a combination of garden soil and potting soil but will update later on to make sure that it works just as well.
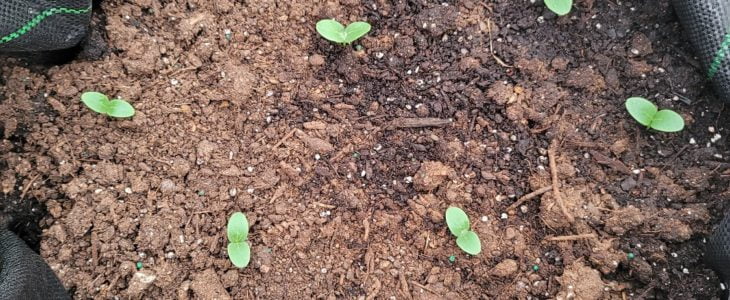
Now you are ready to plant!

I have used this with great success last year and minimizes the need to water for periods of time. I check it every few days but usually water around once a week. You can add the fertilizer down the 1” pipe into the reservoir.
Would you try this Wicking tub DIY? Let us know in the comments below!