Now I know what you’re wondering ….what does Daisy Duck Have to do with Dill pickles? We were coming up with ideas for our daughters Disney birthday party coming up, so we decided on themed ideas – so Daisy Duck’s Dill pickles – creative, right?
So with this DIY we will break down the step by step to make it easy to follow. There are 2 variations with this DIY. I’ve put together a dill pickle recipe – but for this post I’ll include the recipe and how to make it from a package. The steps before and after mixing the ingredient are the same for both.
Prep for the pickles
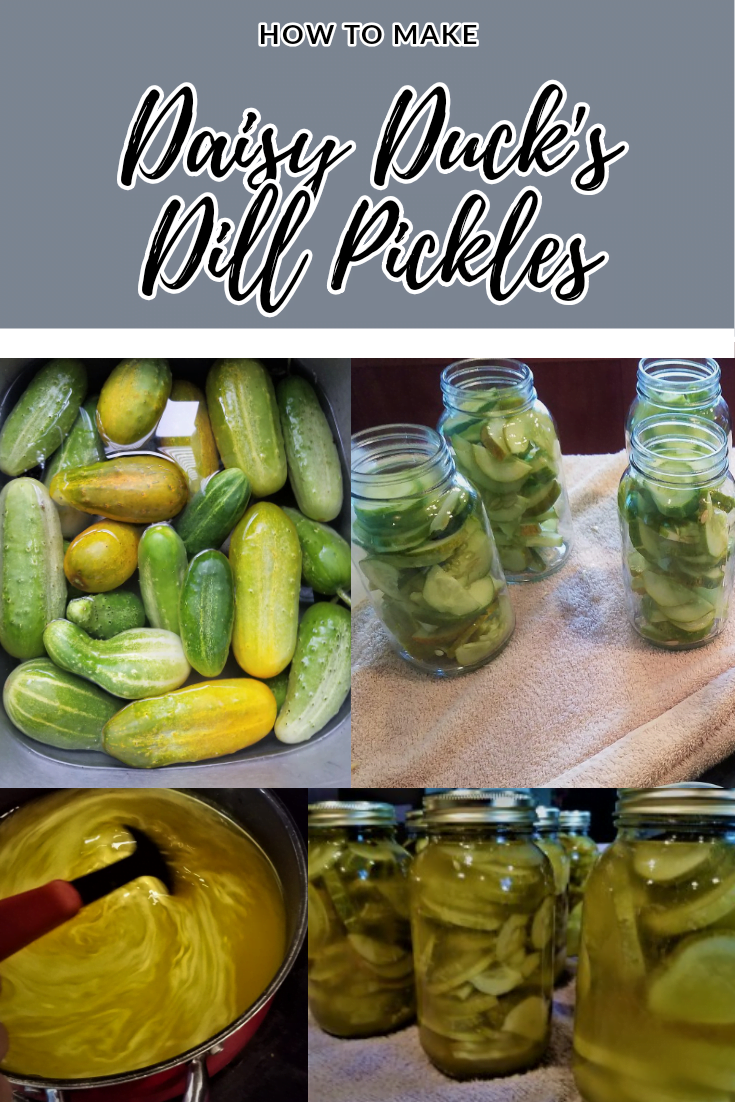
Place the cucumbers into the sink and let them soak or wash them to get off any dirt that may be on them.

Preheat the oven to 225 degrees F place the mason jars in a baking pan and slide into the oven – baking pan just makes it easier to take them out later on. – you can put the lids in the pan as well, but I prefer to boil them to sterilize. Leave them in there for at least 20 mins. We then transferred them onto a couple of towels to cool down.

For the recipe, you’ll need 7 quarts sized mason jars.
Starting the brine – For Homemade dill pickle recipe
- 3 1/3 cups (500 mL) white vinegar
- 7 cups (500 mL) water
- 4 tablespoons (25 mL) pickling salt
- 8 teaspoons dill seeds (20 mL)
- 6 small cloves garlic
- 8-10lbs of cucumbers
Add all ingredients (Vinegar, water, pickling salt, dill seeds, and garlic) in a non-reactive pot and bring to a boil.

Starting the Brine – Prepackaged (Mrs. Wage)
- 7 ⅓ cups of water
- 3 ⅓ cups of white vinegar
- 1 package of Mrs. Wage dill pickle seasoning
- 8-10lbs or so of cucumbers
Pour all ingredients into non-reactive pot and bring to a boil
After creating brine
While that it starting to boil, cut up the cucumbers to size. Some people opt to cut them into spears which works, for use we cut them in to thin slices. After taking the jars out of the oven and having them cool for a few minutes, you can start loading up the jars with cucumbers

Once the vinegar mixture is boiling, pour into the jars over the cucumbers. You should fill them up but leave about ½ inch from the rim. You want it basically about the height of the curvature of the jar.

Securing the Jars
After you have filled the jars with cucumbers and vinegar brine, put the covers on and secure. Make note of lids and how they pop on top. You will need to put them in a large pot with water over the top of the jars and bring to a boil. This helps to seal the jars. In our case, we didn’t have that and were not sure if it would seal properly. I recommend letting them boil for 10 minutes at least but should look at the recommendation of the manufacturer of the Mason jars.

Once you pull the jars out of the bath for the canning process, place on a towel-covered surface or wooden surface. For us, we prefer to place the jars upside down on a towel covered surface and place a towel over the top of it as well. It takes longer to cool but has a higher success rate of sealing properly.
After they jars have cooled, you can check the jars to make sure you don’t get a pop from the center. THis is done by pressing down in the center of the jar lid with a finger nail, it should not move. The other trip i have seen is to tap on the top with a metal spool; if seal properly, it will cause a “thunk” type sound rather than a “tinging” type sound.

**If the jar doesn’t seal properly, they need to be refrigerated and eaten within a week or two.
Final note
Hopefully this was easy to follow. I believe we had bought the jars on sale a little while back and found an easy to follow dill pickle recipe!
The package mix costs around $2, we picked the cucumbers from our garden and the jars I think we bought for around $5. So figure $7-8 for us to make to make 7 quarts which would have cost around $21 in store. Not amazing savings, but still adds up!
Leave a comment below to let me know if you try this out and how it turned out